The VIBE guide
You built it.
Now put it online.
Use Claude Code or Codex on your desktop to publish your AI-built website or app using Cloudflare's Free plan.
Cloudflare can serve websites, run backend code and connect databases. Your coding app checks what your project needs and whether it fits the free allowances. You give the instructions in chat, and the app handles the setup and commands. You sign in, review the website and decide when it goes live.
Get my project onlineStart with free hosting
For compatible projects within each service's free allowances.
Open your project in the desktop app.
Use the app where your project lives. If you only have a preview in an online builder, export or download the project first. The coding app needs the actual files to prepare a deployment.
Both coding apps can run project commands on your behalf, subject to their permissions. Choose a mode that can make changes, rather than one limited to planning or discussion.
See the desktop setup references
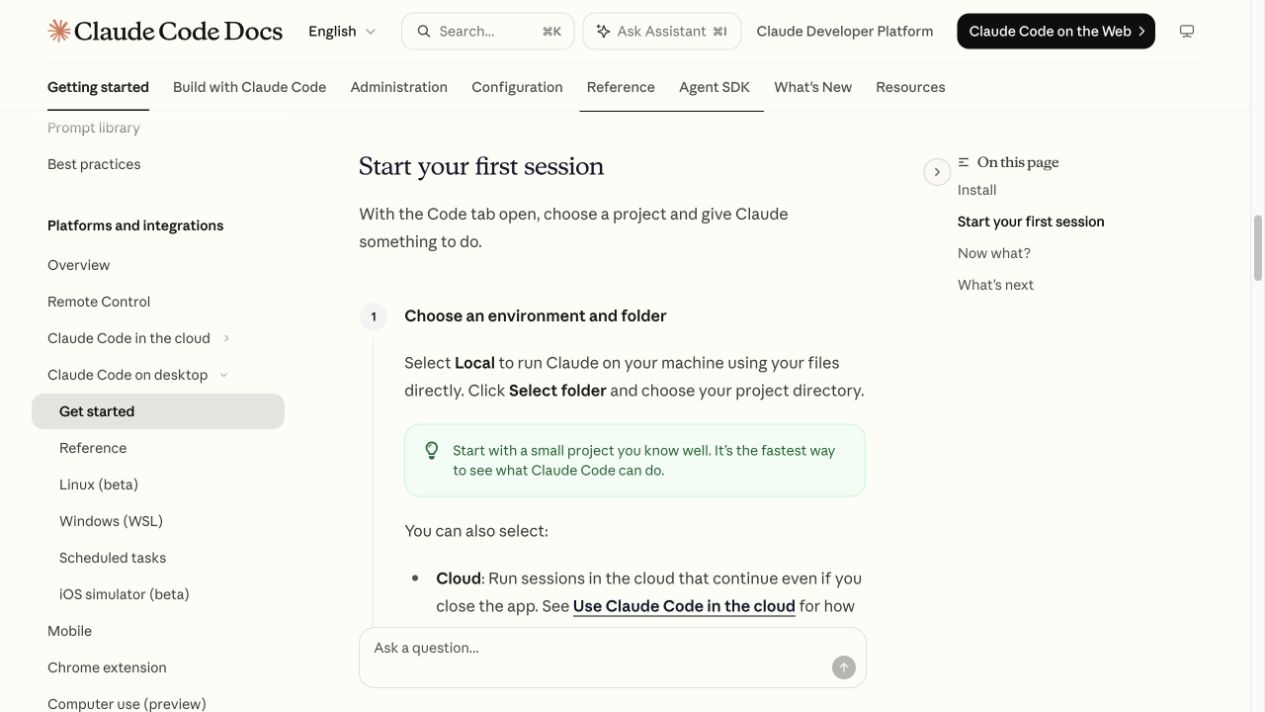
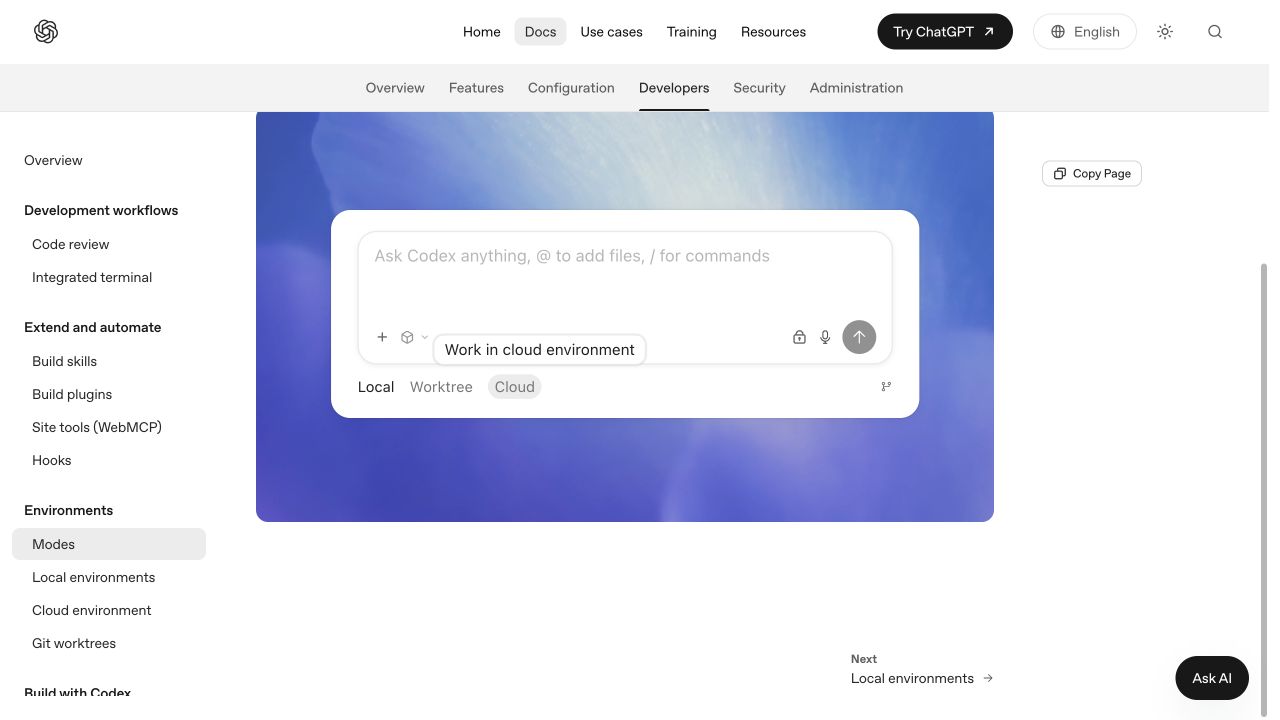
First, ask your coding app to choose the right hosting setup:
I want to put this website or app online using Cloudflare's Free plan. Inspect its framework, frontend, backend, database, login, file storage and external APIs. Use current official Cloudflare documentation to choose a compatible deployment path: static assets, Workers with backend code, or the framework's supported full-stack setup. Preserve all features and existing services. Explain any compatibility changes and list the free allowances or separate costs for each service. Check CPU, requests and storage, not just whether the build succeeds. Tell me what needs testing before we can confirm it fits the Free plan. Do not change or publish anything yet.Which kind of project do you have?
- A website or browser-based tool: Cloudflare can serve its HTML, styles, images and JavaScript as static assets.
- An app with a backend: Workers can run server code and API routes, with services such as D1 for a database.
- A full-stack framework: use its supported Cloudflare setup so server-rendered pages and backend features work too.
You do not have to identify the technical details yourself. Ask your coding app to explain its recommendation. Having a database or login does not automatically mean you need paid hosting. The app must fit the runtime and the free allowances of every service it uses.
If a dependency is incompatible, ask for the smallest supported change and its tradeoffs. Do not remove working features or move existing data just to fit the Free plan.
Cloudflare full-stack applications · Workers Free plan
You are ready when: your coding app can see your files and has confirmed the hosting approach.
Create your free Cloudflare account.
- Open Cloudflare signup in your browser.
- Choose a sign-in method or use your email and a strong password.
- Complete the verification steps Cloudflare asks for.
- Sign in to your account and keep the Free plan for this walkthrough.
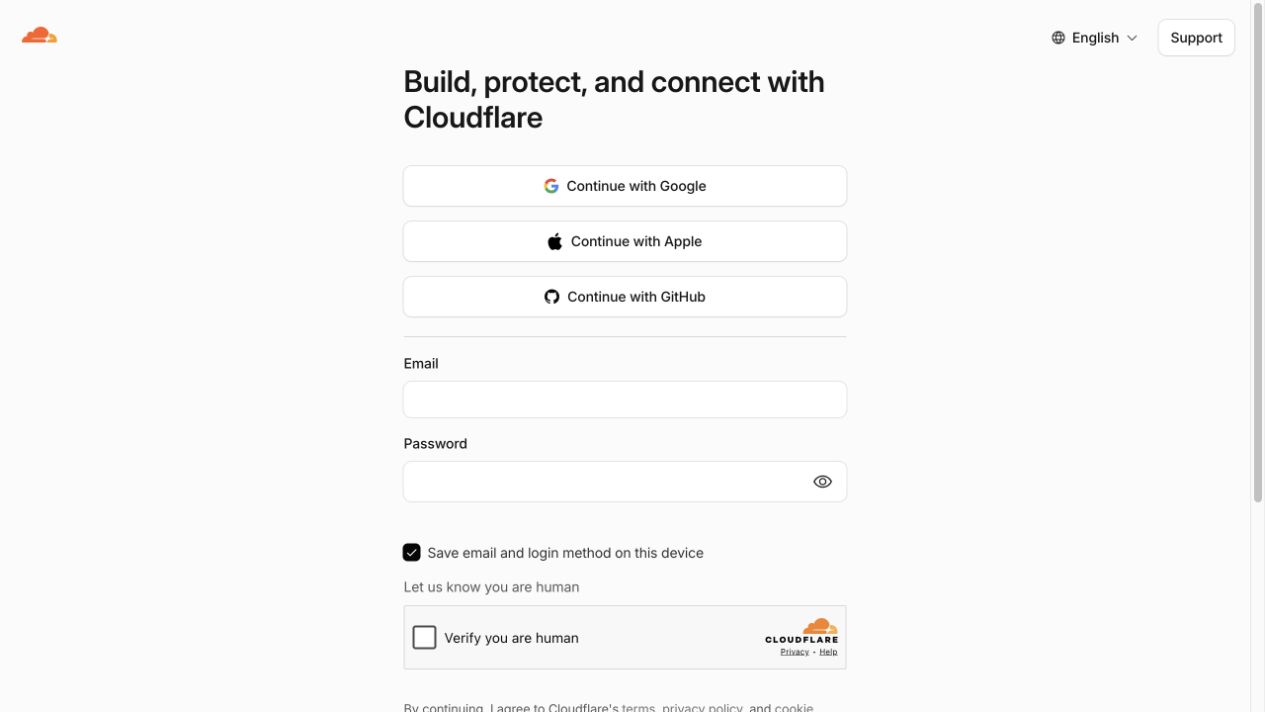
You do not need to buy or transfer a domain. You can start with a free workers.dev address. If onboarding offers domain setup, return to the dashboard and continue with your coding app.
You are ready when: you can sign in to your own Cloudflare account.
Ask your app to install Wrangler.
Go back to your Claude Code or Codex conversation and paste this:
Install the Wrangler CLI for this project for me. First check that this local environment has a supported Node.js version and the project's package manager. Use the official installation method and install Wrangler locally in this project. Preserve existing package files and configuration. If a prerequisite is missing, help me install it and explain any permission or installer step I must complete. Then run Wrangler's version check and tell me the result. Do not deploy yet.Wrangler is Cloudflare's publishing tool. Your coding app can install and use it for you. You do not need to open a separate terminal or install a Wrangler plugin in the app.
If an approval prompt appears, read what it will do and approve the expected installation. If Node.js or another prerequisite needs a system installer, follow the instructions the app gives you, then ask it to continue.
You are ready when: the app reports the installed Wrangler version after running its version check.
Connect your Cloudflare account.
In the same conversation, paste:
Connect Wrangler to my Cloudflare account using its browser login. Start the login flow and open or show me the authorization link so I can sign in myself. Once I finish, run Wrangler whoami and confirm the correct account. If there is more than one account, ask me which one to use. Keep credentials and tokens out of this chat. Do not deploy yet.- Open the Cloudflare authorization page your coding app opens or links to.
- Sign in to your own account.
- Review and approve the access Wrangler needs to publish your project.
- Return to your coding app and say: “I've completed the login. Check the connection.”
Do not paste your password or login tokens into the chat. If you belong to several Cloudflare accounts, choose the account that should own this project.
If authorization does not finish, ask the app to check whether it is running locally and whether the browser login callback reached it. Keep the login browser and coding session on the same computer for this walkthrough.
You are ready when: the app runs the account check successfully and identifies the intended Cloudflare account.
Let your coding app prepare the project.
Once you understand and agree with the proposed hosting setup, paste:
Prepare this project using the Cloudflare deployment approach we agreed on. Follow the current official guide for its framework and use its existing package manager. Preserve frontend and backend features. For a static site, configure the public asset folder. For a full-stack app, configure both the frontend assets and server entry point or supported framework adapter. Only browser-safe files belong in the public assets folder; deploy backend code as a Worker, never as downloadable assets. Keep credentials in server-side secrets. Preserve existing data and services, and explain configuration changes. Build and check runtime compatibility. Do not enable paid services or publish yet.Your coding app should prepare the frontend and any backend your project needs. You do not have to edit configuration files yourself. Ask it to explain what visitors can download and what runs privately on the server.
If your app uses a database, login, uploads or APIs
These features need their own setup. A successful frontend build does not connect them automatically. Paste this follow-up:
Set up the services required by our agreed plan. Reuse existing services without changing their data or permissions. For new Cloudflare services, confirm their free allowances before creating only the resources we need. Show me any separate subscription or billing requirement before proceeding. For a new D1 database, prepare its schema and local test data; ask before migrating existing data. Bind resources to the correct Worker and environment. Configure login callbacks for local testing and explain what must change for the live URL. Keep API keys and credentials server-side and use a secure secret-entry flow. Do not expose secrets in chat, logs or public files. Do not enable paid services or deploy yet.If your project already uses an external database or authentication provider, it may make sense to keep it. Its own plan and limits still apply.
You are ready when: the build succeeds, the backend setup is explained, and all required services and remaining deployment steps are identified.
Preview and test your project.
Paste this in the same conversation:
Start this project's local preview using its Cloudflare-compatible runtime and open it, or give me the link. Test the homepage, images, navigation, page refresh and mobile layout. If present, test backend routes, login and logout, protected data, database reads and writes, forms, uploads and API calls with test data. Verify private data is unavailable without authorization. Identify mocked services and checks that need the deployed environment. Check representative CPU usage where measurable and explain remaining Free-plan limits to verify. Do not send real customer messages or trigger payments. Keep the preview running for my review. Do not publish yet.Open the preview the app provides. Look at it as a visitor would: read the page, click the buttons, open another page and refresh. Check the mobile layout. If the app has a login, test both signing in and signing out. Save a test record and reload it. Check forms and uploads with test data. Ask which services are local simulations and which were tested against the real service.
If something is wrong, describe it or attach a screenshot to the conversation. Ask the app to fix that issue and show the preview again.
You are ready when: you are happy with the preview and the main visitor actions work.
Ask your app to publish it.
Publishing makes your site or app reachable online. Public assets are downloadable; backend code should run on the server. Your app must enforce login and permissions for private information. When you are ready, paste:
The preview is ready. Publish this website or app to the selected Cloudflare account using our agreed Free-plan setup and a new project name with a workers.dev address. Confirm the destination if ambiguous. Use the framework's documented deployment command. Deploy both frontend and backend when needed, configure server-side secrets securely, and verify resource bindings. For a new database, apply the reviewed schema. Before modifying an existing database, show me the migration and backup plan and wait for approval. Do not overwrite another project, change DNS or enable paid services. Open the public HTTPS link and test the main user flows with test data, including login, protected routes and data persistence if present. Check deployed usage and errors, and report anything untested or outside the free allowances. Keep secrets out of chat and public files.The app runs the deployment and returns your public link. Open the actual address it gives you. A typical address looks like https://your-site.your-subdomain.workers.dev.
Try it as a visitor
Keep working with your coding app until any failed checks are fixed. Then share the link.
You are ready when: visitors can open the site without your Cloudflare or coding-app login, and private app features still require their intended sign-in.
Make changes in the same conversation.
Tell your coding app what you want to change. Once it has made the changes, paste:
Update this same Cloudflare website or app. Keep the same project, account and existing data. Rebuild if needed, preview and test the frontend and backend flows first. Check that changes still fit the Free-plan setup. Show me any database migration and its backup plan before applying it. Preserve secrets and resource bindings. Show me the preview before publishing the update.Review the updated preview, then say “Publish this update to the same project.” After it finishes, open the public link again and check the change.
Ask the app to save a working code version before a larger change. If a change affects stored data, back up the database too; a code commit is not a database backup.
What can you host for free?
Cloudflare's Free plan supports websites and compatible dynamic apps. Backend code, databases and other services each have their own allowances. Your coding app should check the whole project before calling it free to run.
| What you use | Free allowance and limits |
|---|---|
| Static assets | Requests served directly as static files are free and unlimited. Requests that execute a Worker use its allowance. |
| Backend code and APIs | 100,000 Worker requests per day across the Free account, with 10 ms of CPU time per invocation. |
| D1 SQL database | 5 million rows read and 100,000 rows written per day, with 5 GB total storage. Up to 10 databases, each limited to 500 MB. |
| Projects and public files | Up to 100 Workers per Free account. Each Worker version can have 20,000 static files, up to 25 MiB per file. |
| External services | Your database, authentication, email or AI provider may have its own free allowance or charges. Hosting does not include those subscriptions. |
| Your coding app and domain | Use the coding-app access you already have. A purchased domain is optional; you can begin with a workers.dev address. |
What those limits mean for your app
Requests are not visitors. One visit may call several backend routes. CPU time measures active processing; time waiting for a database or network response does not count. Server rendering, authentication and other heavier work can exceed the free CPU limit, so test representative actions.
If the account reaches its Workers or D1 daily allowance, affected operations can fail until the allowance resets or you choose to upgrade. A working preview does not guarantee that the app will stay within free limits as usage grows.
File uploads and AI features
R2 file storage: Standard storage includes 10 GB-month, one million Class A operations and ten million Class B operations per month. R2 requires a separate subscription setup and bills usage beyond its allowance. Ask your coding app to explain the setup before enabling it.
Workers AI: eligible models have a free allocation of 10,000 Neurons per day. Neurons measure model usage, not a fixed number of messages. Some models require paid billing. An app built with AI does not necessarily use AI when visitors run it; if it calls an external AI API, that provider's pricing applies.
Keep the Free plan unless you deliberately choose to upgrade. Ask your coding app to show you where to check requests, CPU usage and database usage in Cloudflare.
Static asset pricing · Workers pricing · Workers limits · D1 pricing · D1 limits
If something goes wrong.
The app only gives me commands to copy
Say: “Please run those commands for me in this local project. If you cannot, tell me which permission or capability is missing.” Check that you are in Claude Code or a local Codex coding task, with permission to make changes.
Installation asks for approval or fails
Read the installation request and approve the expected action. If a prerequisite is missing, ask the app to explain the required setup for your computer. Do not disable all security settings to force the installation.
The Cloudflare login does not complete
Tell the app that authorization has not completed. Ask it to check the local login process and callback. If your session is remote or cloud-based, switch to the local project on your computer for this walkthrough. If the local browser callback still fails, ask the app whether Wrangler device authorization is available and have it guide you through that browser-based flow.
The app chose the wrong Cloudflare account
Tell it which account should own the site. Ask it to check the signed-in user and account selection before retrying. A single login can have access to more than one account.
The homepage works but another page fails
Tell the app the failing URL and whether the error appears after a refresh. Ask it to check the routing for your project and test the fix in preview before publishing.
A form, login or AI feature does not work
Tell the app which action fails. Ask it to check deployed backend routes, resource bindings, server secrets, database migrations and login callback URLs. Test using a normal user account. Having a page online does not prove that its backend works.
The app works locally but fails after deployment
Ask your coding app to inspect the deployed error logs and the framework deployment setup. Check runtime compatibility and whether local data or mocked services were mistaken for live resources. Keep secrets out of shared logs.
The app hits a free usage limit
Ask which service and limit was reached. Review requests, CPU and database usage. Ask for an optimization or a clear upgrade recommendation before enabling paid services.
For any other error, paste this with the error message or a screenshot:
Fix this issue in our Cloudflare setup: [describe the issue or attach a screenshot]. Inspect the actual error and explain the cause in plain language. Make the smallest change needed, preserve existing features, and test it. Keep secrets out of the chat and public files. Do not add paid services. Tell me what you need me to do, if anything.Want to see the commands?
This reference is optional. Your coding app runs these steps for you in the main walkthrough.
Show the optional terminal reference
These are examples for an npm project. Use the project's actual package manager and build script. For plain HTML with no package.json, initialise the package first with npm init -y.
npm install --save-dev wrangler@latest
npx wrangler --version
npx wrangler login
npx wrangler whoami
The commands below illustrate a basic Workers project. Frameworks may use different build, preview and deployment scripts. Have your coding app follow the official framework guide and configure frontend assets, backend code and service bindings as needed. Build only if the project has a build step:
npm run build
npx wrangler dev
After reviewing the preview, stop it with Ctrl+C, then publish when ready:
npx wrangler deployFor updates, keep the same account and project name. Rebuild, preview and deploy again.
Useful official guides
- Claude Code desktop
- Codex desktop app
- Install Wrangler
- Wrangler login and commands
- Publish static assets
- Publish a full-stack application
- Set up a D1 database
- Choose your framework deployment guide
Muhammad Asmal
@asmaldigital
Want to build more with AI?
Getting your website or app online is one step. If you want help putting AI to work across your business, come and join me inside AI Lead Builder.
You’ll get practical training, AI and marketing tools, and weekly live coaching with me to help you build, ask questions and work through what’s holding you up. You’ll also be part of a community of agency owners and business owners putting AI to work in their businesses.
Get over 75% off your first month.
See what’s inside AI Lead Builder